

From Design Validation to Production-Ready Plastic Parts
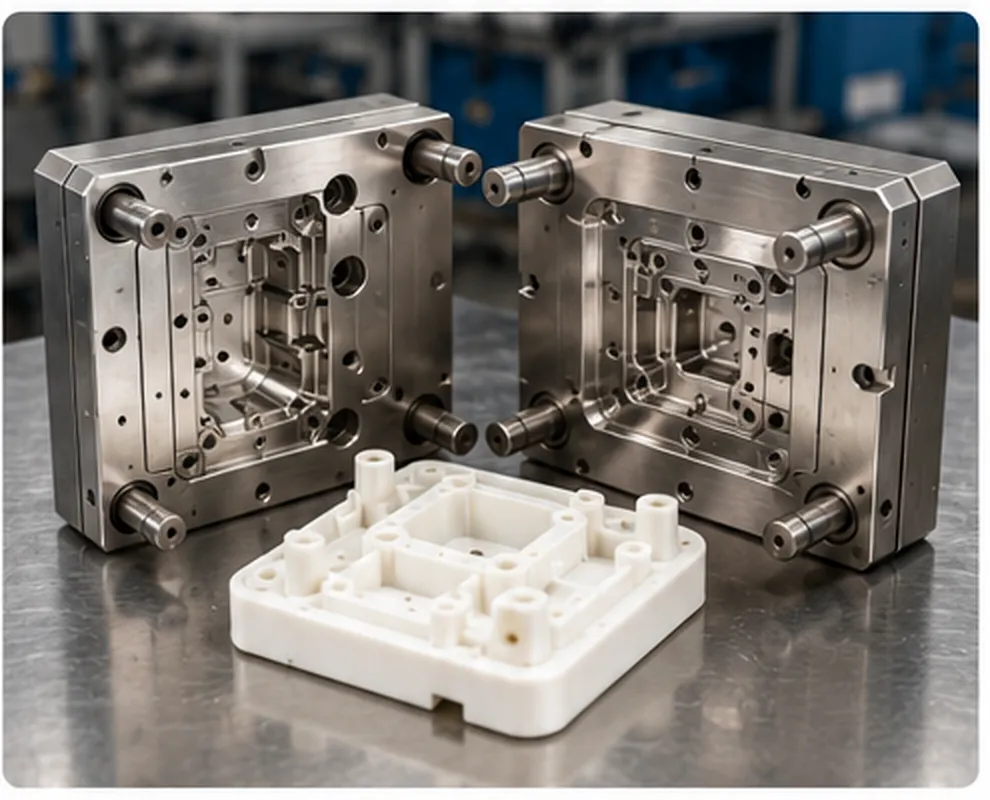
Injection molded prototypes play an important role in the development of plastic products. They allow engineering teams to test components made from real production-grade thermoplastics before committing to expensive mass-production tooling. Compared with appearance models or basic 3D-printed samples, injection molded prototypes provide more realistic information about material performance, dimensional stability, assembly fit, surface quality, strength, and manufacturing feasibility. This process is particularly valuable for automotive components, medical equipment housings, consumer electronics, industrial devices, communication products, home appliances, and other applications that require accurate and repeatable plastic parts.
What Is an Injection Molded Prototype?
An injection molded prototype is a plastic sample manufactured through an injection molding process using a prototype mold or rapid tooling system. Plastic resin is heated until it melts, injected into a closed mold cavity, cooled, and then ejected as a finished component. The basic molding principle is the same as conventional production injection molding. The main difference lies in the purpose, tooling strategy, expected mold life, lead time, and production quantity.
Prototype molds are generally designed for product verification, engineering testing, pilot production, customer samples, certification, and small-volume market trials. They are often simpler and faster to manufacture than long-life production molds. Because the parts can be made with the intended production resin, they are useful for evaluating real product behavior under heat, impact, pressure, chemical exposure, repeated use, or assembly stress.
Companies preparing to verify a new plastic component can learn more about professional injection molded prototype services.
Why Use Injection Molded Prototypes?
Early prototypes made by CNC machining, SLA, SLS, FDM, or vacuum casting are extremely useful during concept development. However, these methods may not accurately reproduce every characteristic of an injection-molded part. Injection molded prototypes are often selected when a project must verify final plastic material performance, structural strength, snap-fit behavior, living hinges, screw boss performance, assembly tolerances, chemical resistance, heat resistance, surface texture, color consistency, warpage, shrinkage, gate location, weld lines, ejection marks, resin flowability, and repeatability between parts.
The process is also useful when a company needs dozens, hundreds, or several thousand identical components for engineering builds, customer demonstrations, market testing, or pilot production. By identifying problems at this stage, the product team can make design changes before investing in high-volume tooling. This reduces the risk of expensive mold modifications, unstable production, defective components, and delayed product launches.
Injection Molded Prototypes vs. Other Prototype Methods
3D-Printed Prototypes
3D printing is fast and flexible. It works well for concept models, appearance evaluation, design comparisons, complex geometries, and one-off parts. However, printed materials and layer-based structures may behave differently from molded production plastics.
CNC-Machined Prototypes
CNC machining can create highly accurate prototypes from solid plastic or metal stock. It is useful for structural testing and small quantities, but machined parts may not reproduce molding-related features such as weld lines, gate marks, flow patterns, shrinkage, and molded surface texture.
Vacuum-Cast Prototypes
Vacuum casting can produce multiple polyurethane parts from a silicone mold. It offers a good appearance and is suitable for small batches, but polyurethane simulants may not match the exact properties of production thermoplastics.
Injection Molded Prototypes
Injection molded prototypes are usually the best choice when a project requires actual thermoplastic resin, realistic manufacturing conditions, consistent dimensions, functional assembly testing, or pilot-production quantities.
A broader comparison of prototype technologies is available through the company’s rapid prototyping capabilities.
Step 1: Product Design and Engineering Review
The process begins with a review of the product’s 3D model, 2D drawings, material requirements, intended use, annual quantity, surface finish, tolerances, and assembly conditions. Engineers should identify critical dimensions and functional areas such as sealing surfaces, bearing locations, snap fits, screw connections, optical windows, electrical interfaces, and mating features.
The development team should also confirm the purpose of the prototype. A mold designed for ten engineering samples may differ from one intended to manufacture several thousand market-ready parts. Clear requirements help the mold manufacturer choose an appropriate tooling material, cavity layout, runner system, gate type, cooling method, and inspection plan.
Step 2: Design for Manufacturability Analysis
Design for manufacturability, commonly called DFM, evaluates whether the plastic component can be molded consistently and economically. A DFM review normally examines wall thickness, draft angles, ribs, bosses, undercuts, corners, parting lines, gate location, ejector placement, shrinkage, venting, and expected cosmetic marks.
Uniform wall thickness supports even filling and cooling. Sudden thickness changes can lead to sink marks, voids, internal stress, long cycle times, and warpage. Draft allows the molded part to release from the mold, while carefully designed ribs and bosses improve strength without creating unnecessarily thick sections. Undercuts may require sliders, lifters, removable inserts, or collapsible cores, which add cost and complexity.
A comprehensive service provider can coordinate design, prototyping, tooling, and manufacturing through an integrated one-stop product development process.
Step 3: Selecting the Prototype Mold Strategy
The mold strategy should be based on required quantity, part geometry, material, tolerance, surface finish, budget, and schedule. Aluminum molds are fast to machine and transfer heat efficiently, making them suitable for simple parts, short runs, and non-abrasive resins. Pre-hardened steel provides greater durability and dimensional stability and is often selected for larger quantities, tighter tolerances, textured surfaces, abrasive materials, or projects expected to continue into low-volume production.
A standard mold base can also be combined with custom cavity and core inserts. This approach reduces tooling cost and works well for smaller components or repeated prototype programs. Single-cavity molds usually have lower initial cost and are easier to adjust, while multi-cavity molds can reduce unit cost when higher quantities are required.
Additional information about tooling strategies can be found on the prototype and production mold service page.
Step 4: Selecting the Plastic Material
Material selection has a major influence on product performance and mold design. ABS is widely used for housings and consumer products because it provides good impact resistance, dimensional stability, and surface appearance. Polycarbonate offers high impact strength and can be transparent. Polypropylene is lightweight, chemically resistant, and suitable for living hinges. Nylon provides good strength, wear resistance, and temperature performance, while glass-filled nylon delivers higher stiffness but can increase mold wear. POM offers low friction and dimensional stability, and TPE or TPU materials are useful for flexible grips, seals, protective covers, and overmolded features.
The material decision should consider strength, stiffness, impact resistance, chemical exposure, operating temperature, UV resistance, flame-retardant requirements, color, surface finish, shrinkage, moisture absorption, regulatory requirements, and long-term availability.
Step 5: Mold Design and Manufacturing
After the DFM review and tooling strategy are approved, the mold engineer designs the cavity, core, mold base, runner, gate, cooling channels, ejection system, sliders, lifters, vents, and inserts. The mold should fill evenly, release trapped air, cool efficiently, and eject the part without deformation. For complex components, mold-flow analysis may be used to predict filling patterns, weld lines, pressure requirements, air traps, shrinkage, warpage, gate performance, and cooling behavior.
Prototype molds are commonly manufactured with CNC machining, electrical discharge machining, wire cutting, grinding, drilling, polishing, and manual fitting. After machining, all components are inspected and assembled. Sliders, ejector pins, lifters, and inserts must operate smoothly, and cooling circuits should be checked for leaks before the first trial.
Step 6: Mold Trial and Sample Production
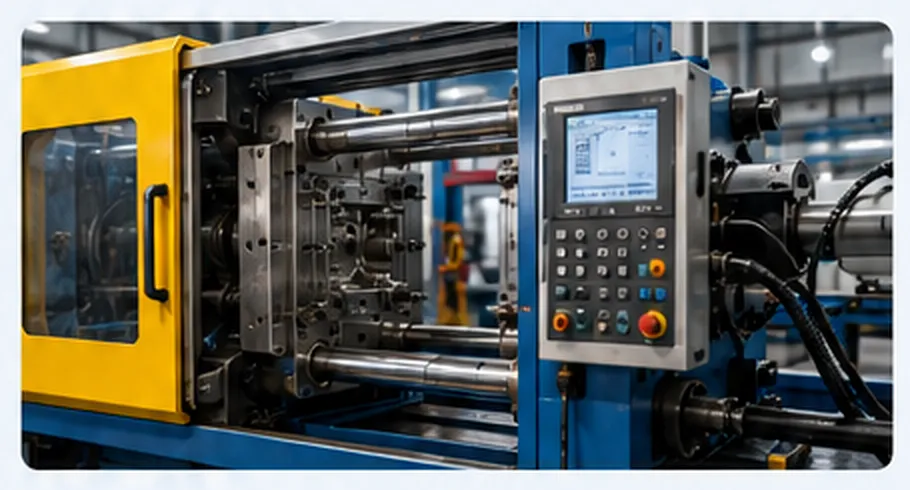
The first trial is often called T0. During this trial, the molding team installs the mold and establishes initial process parameters, including melt temperature, mold temperature, injection speed, injection pressure, holding pressure, holding time, cooling time, screw speed, back pressure, clamp force, and material drying conditions.
The first samples are evaluated for short shots, flash, burn marks, sink marks, weld lines, deformation, surface defects, gate appearance, ejection marks, and dimensional accuracy. The molding engineer adjusts process settings to determine whether a defect is caused by the mold, the part design, the resin, or the molding conditions.
Step 7: Inspection, Validation, and Modification
Prototype parts should be checked against approved drawings and product requirements. Common methods include dimensional measurement, visual inspection, assembly testing, drop testing, impact testing, load testing, temperature testing, chemical resistance testing, leak testing, electrical testing, color comparison, surface-finish inspection, and material verification.
The first mold trial is rarely the final development step. Sample inspection may identify areas that need adjustment, such as dimensions, venting, gate size, ejector location, fit conditions, sink marks, texture, or warpage. The mold is then modified and tested again through T1, T2, or later trials until the agreed requirements are met.
Step 8: Pilot and Low-Volume Production
Once the molded prototypes are approved, the same tool may be used for pilot production or a limited commercial launch, depending on its design and expected life. Pilot production helps verify production repeatability, assembly time, packaging methods, operator instructions, quality standards, material supply, unit cost, customer response, field performance, and demand forecasts.
When the design and market demand become stable, professional plastic injection molding services can support the transition from prototype samples to repeatable production.
Common Defects in Injection Molded Prototypes
Sink marks are surface depressions that usually appear near thick sections, ribs, or bosses. Warpage occurs when a part cools or shrinks unevenly. Short shots happen when the cavity does not fill completely, while flash is excess plastic along the parting line or around inserts. Weld lines form where separate flow fronts meet, and burn marks can appear when trapped air is compressed and overheated. Each defect should be analyzed in relation to design geometry, tooling condition, material behavior, and process parameters rather than corrected through trial and error alone.
Cost Factors and Supplier Selection
Project cost depends on part size, complexity, tooling material, cavity count, required quantity, resin, surface finish, dimensional tolerance, undercuts, sliders, lifters, mold life, inspection requirements, trial requirements, and delivery schedule. The lowest mold quotation may not provide the best total value. Poor engineering can lead to repeated modifications, unstable dimensions, excess scrap, delayed testing, and additional development cost.
A capable supplier should understand product design, DFM analysis, material selection, mold design, injection molding, inspection, and low-volume manufacturing. Buyers should evaluate experience with similar components, engineering communication, molding equipment, quality systems, material sourcing, tooling ownership terms, modification support, project management, intellectual-property protection, and the ability to scale into production.
Conclusion
Injection molded prototypes create a reliable bridge between early product concepts and full-scale manufacturing. They allow product teams to evaluate real thermoplastic materials, verify part design, test assembly, inspect molding defects, and produce consistent samples under realistic manufacturing conditions. A successful project depends on clear requirements, detailed DFM, appropriate tooling materials, careful mold design, controlled trials, accurate inspection, and effective communication between the customer and manufacturer.
When used at the right stage, injection molded prototypes can shorten development time, reduce tooling risk, improve product quality, and provide the technical confidence needed to move into pilot or mass production.
Copyright 2026(C) HUAWEI PRODUCT DEVELOPMENT INDUSTRIAL LTD (2009-2024)
All Rights Reserved
marketing@prototypeinjectionmold.com
Contact Information :
Byron Wang
Phone: +86- 86-755-8238-2595
Mobile: +86-139-2383-5403
Email: marketing@prototypeinjectionmold.com
HPDI (HUAWEI PRODUCT DEVELOPMENT INDUSTRIAL LTD)
Address:Building 3, Puxia Industrial Zone, Liuyue, Henggang St., Longgang District, Shenzhen., China